

Discover how to make homemade playdough for learning fun with this simple guide. Creating playdough at home is not only cost-effective but also a delightful way to spark creativity in children. This step-by-step recipe will walk you through the process, share essential tips, and suggest educational activities that make learning fun and engaging. Let’s dive into the colorful world of homemade playdough!
The Benefits of Homemade Playdough
Encourages Creativity and Imagination
Homemade playdough provides children with an open-ended platform for creativity. They can mold, shape, and create anything they envision, which fosters imaginative play. This hands-on experience is essential for developing young minds.
Enhances Motor Skills
Playing with playdough improves fine motor skills. Children squeeze, roll, and flatten the dough, strengthening their hand muscles and enhancing coordination. These activities are crucial for handwriting and other tasks requiring precision.
Educational Fun
Incorporating lessons with playdough can make learning fun. Children can learn colors by mixing different dyes, practice counting by forming numbers, or even create shapes and letters to improve their literacy skills.
Safe and Non-Toxic
When made at home, playdough is usually safe and non-toxic, using basic ingredients found in most kitchens. This makes it both a budget-friendly and worry-free activity for parents and caregivers.
Aids Sensory Development
The texture, colors, and smell of homemade playdough contribute to sensory development. These sensory experiences are vital for brain development and help children learn about the world through touch and smell.
Therapeutic Benefits
Molding and squishing playdough can have calming effects. It acts as a stress-reliever for children and can be used in therapeutic settings to help kids express emotions through play.
Essential Ingredients and Tools

To create the perfect homemade playdough that combines fun with learning, assembling the right ingredients and tools is key. Start with basic household ingredients like flour, salt, and water. These form the base of your playdough, giving it the right texture. Add cream of tartar to improve elasticity, and a splash of vegetable oil to keep it smooth.
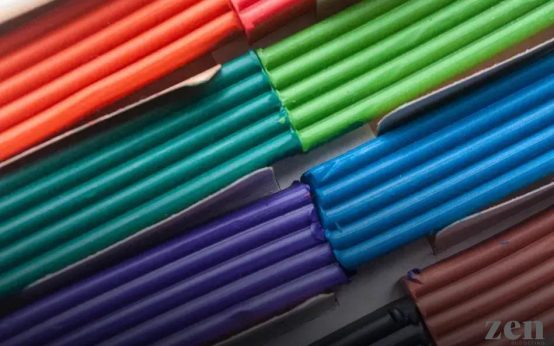
Food coloring can bring your playdough to life with vibrant hues, making it even more engaging. Consider including scented oils for a sensory experience that delights the senses. Tools play a crucial role too. A mixing bowl and a sturdy spoon are essential for combining ingredients. A rolling pin can flatten out the dough for creative shapes.
When measuring, accurate portions lead to the best consistency. Use a measuring cup and spoons to ensure precision. Keep a cutting board or a clean counter surface ready for kneading. Additionally, consider having shape cutters and a butter knife on hand to explore different patterns and forms.
Remember, the simpler your setup, the more focused the learning activity becomes. Gather your ingredients and tools before starting, ensuring a smooth and enjoyable experience. This guarantees an educational play session where kids learn while having endless fun.
Step-by-Step Playdough Recipe
- Gather Your Supplies: Ensure you have all ingredients ready, such as flour, salt, cream of tartar, water, food coloring, and oil. Check your kitchen for measuring cups and bowls.
- Mix the Dry Ingredients: Use a large bowl to combine flour, salt, and cream of tartar. Blend the ingredients well, making sure they have a uniform texture.
- Add Wet Ingredients: Gradually pour the water into the dry mix, stirring continuously. Incorporate the oil and stir until the mixture is smooth.
- Heat the Mixture: Transfer the mixture into a saucepan and cook over low heat. Stir continually as the dough starts to form and thicken.
- Add Color: Once the dough forms, remove it from heat. Add a few drops of food coloring and knead the dough until the color blends evenly. Be creative with color combinations!
- Cool and Store: Let the playdough cool down on wax paper. Store it in an airtight container to keep it fresh for repeated use.
Each step brings you closer to making a batch of homemade playdough that is both fun and educational. Enjoy the process and watch learning unfold as children play and explore with their new creation!
Creative Learning Activities with Playdough

Engaging children in creative activities with playdough fosters both fun and educational experiences. Playdough can be an excellent tool for teaching a variety of concepts through hands-on play. Here are some ways to integrate learning while playing with playdough:
1. Letters and Numbers
Using playdough, children can shape letters and numbers. This helps to reinforce their understanding of the alphabet and basic numerals. Encourage them to form their name, using playdough to build each letter. For numbers, you can ask them to create simple equations or represent age.
2. Shapes and Geometry
Introduce basic geometric concepts by rolling out playdough and cutting it into shapes. You can also construct 3D shapes, such as cubes and pyramids, enhancing spatial awareness and fine motor skills. Use different colors to categorize and compare shapes by size and form.
3. Science Experiments
Conduct simple experiments to demonstrate scientific principles. For instance, playdough can simulate the layers of the Earth or the concept of buoyancy in water. It also allows kids to engage in inquiry-based learning, prompting questions and hypotheses.
4. Storytelling and Imagination
Create characters, animals, or objects using playdough to tell a story. Encourage children to craft scenarios and narrate their tales, boosting their creativity and language skills. Reinforce this by discussing the plot, settings, and characters created.
5. Mathematics Fun
Utilize playdough for counting games. Roll small balls and divide them into groups to practice addition, subtraction, or even simple multiplication. This tactile approach to mathematics makes abstract concepts more tangible and enjoyable.
6. Fine Motor Skill Development
While playing, rolling, pinching, and molding playdough, children develop fine motor skills and hand-eye coordination. These activities are crucial for writing readiness and general dexterity.
Incorporating these activities with homemade playdough provides a sensory-rich way for children to explore and learn.
Tips for Storing and Keeping Fresh
Storing Playdough for Longevity
To ensure your homemade playdough stays fresh and usable, proper storage is key. First, always allow the playdough to cool completely before storing it. Warm playdough can create condensation, leading to mold over time.
Choosing the Right Container
Use airtight containers to keep playdough from drying out. Plastic containers with secure lids or resealable plastic bags are ideal for this purpose. Ensure there’s minimal air inside the container for optimal preservation.
Temperature and Light Considerations
Store your sealed playdough in a cool, dark place. Direct sunlight can make colors fade and affect the texture. A pantry or a cupboard works well to maintain consistent temperatures.
Refreshing Dried-Out Playdough
If your playdough starts to dry, a small amount of water can bring it back to life. Simply knead the dough with a few drops of water until it regains its original consistency.
Keeping Playdough Hygienic
Encourage handwashing before and after play to keep the dough clean. Regularly check for foreign objects, and if the playdough becomes too dirty, it’s best to start fresh with a new batch.
 Gardening with Kids: Growing Curiosity and Fun Together
  Using Car Rides for Counting and Language Games
 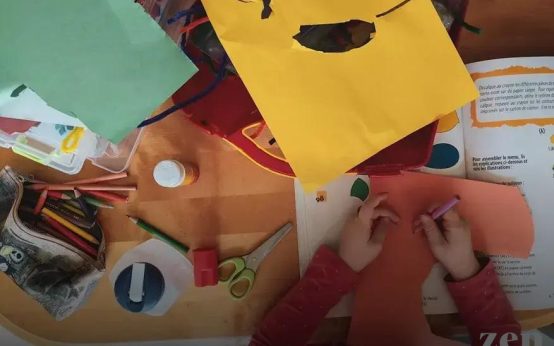 Grocery Store Adventures: Turning Shopping into Fun Learning